One of the reasons iPhones have become so popular is because of the quality of pictures they take. The popular smartphones have great cameras, and they’ve only expanded their photo capacity with the recently released line of iPhone 12 Pro. So, if you recently invested in one of the new iPhone 12s, let us share our best iPhone photography tips so that you can fully utilize your iPhone 12 camera.
How to take the best photos on the iPhone 12 camera
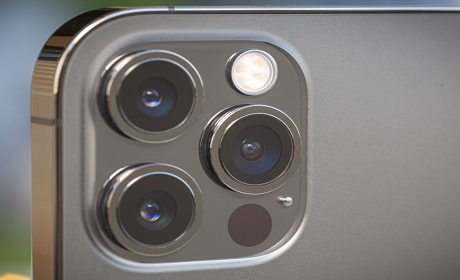
The iPhone 12 Pro has two cameras on the back and one selfie camera on the front. The iPhone 12 Pro has three cameras on the back and one front-facing camera. Whatever model you choose, the camera has the ability to take some amazing images! Make sure you’re running iOS 14.3 (and update to iOS 14.4 when it’s available) to be able to use all the techniques below.
Edit your exposure
This feature is available on iPhone 12 and some older model iPhones with iOS 14. You can manually adjust your exposure when taking images, which is helpful when you’re taking images with high contrast. The iPhone typically auto-adjusts exposure pretty well, but if you’re taking a picture and the exposure doesn’t look quite right, you can now manually adjust it. For example, if you’re capturing a picture of your friend in front of a bright sky, and your friend looks more like a silhouette, you can use this feature to brighten up the photo subject. To manually adjust exposure on the iPhone 12, follow these steps:
- Tap and hold to lock your focus on your main focal point
- Touch the arrow at the top of your screen or swipe up in the camera app to access exposure controls
- Scroll the exposure up or down for a brighter or darker exposure on your photo
Choose your view
The iPhone 12 has a standard, wide, and an ‘Ultra Wide’ view built into its dual 12-megapixel camera system. The Ultra Wide has an aperture of ƒ/2.4 aperture and a 120° field of view. This can be useful, depending on the type of photo you’re taking. You can try switching between views on your camera to see what looks best in the composition you’re framing. Keep in mind portrait or landscape as well, turning your phone horizontal or vertical and seeing what looks best for the photo you’re trying to capture.
Use grids
In your iPhone’s settings, you can turn on a grid function. When on, you’ll see a grid over your camera view. Aligning your main photo subject with segments on the grid can help compose the photo using the rule of thirds. The rule of thirds is a composition structure that splits an image into nine segments (with three vertical and three horizontal lines). Essentially, you want the main focal points of your photo to sit somewhere along the intersections of those lines. Using the grid will help you line up your subject and create a visually pleasing composition. To turn grids on, follow these steps:
- Navigate to your iPhone settings app.
- Find and select Camera Settings.
- Scroll to the Composition section and turn on Grids
If you’re shooting a photo from above, Grids will also provide you with two crosshairs in the center of your photo to show you when your iPhone is level. Simply line the crosses up, and your photo will be perfectly level!
Live mode
iPhones have a setting that allows you to take photos in Live Mode. If this setting is on, you’ll have a few seconds of video before your still image. After taking a live photo, you can scroll through the video and select the best still images from the video. This can be helpful if you’re taking a picture of a large group or active subjects such as kids and dogs. Live images take up more memory and storage on your phone, so you may want to use this mode only when needed rather than keeping it on all the time.
Portrait mode
Portrait mode allows you to take great photos of subjects by focusing on the foreground and making the background out of focus. This creates a depth of field in photos that can make them look more professional. In photography, this technique is called bokeh. Adjust the amount of blur used in the background of your photo by changing the f stop. Try to use this fun feature sparingly, only blurring the background a small amount for a more realistic look.
Portrait mode will automatically use the 2x lens, but you can manually choose between that or the main lens. You may want to try switching, especially if you’re near your photography subject. There are also different filters for portrait mode, including studio lighting, natural lighting, stage lighting, and more.
Night mode
The iPhone 12 camera improves Apple’s nighttime shooting ability. You don’t need to turn this setting on; it will automatically start when shooting in low light. A moon-shaped icon will appear on the screen, and that lets you know it’s on. If you’re holding your phone in your hand, night mode will cause the photo to expose a small amount, leaving the shutter open for longer. However, if you lock your phone into a tripod, your phone will recognize that it is stabilized, and the exposure will go even longer, creating a better night image.
HDR mode
There’s now an option for HDR, or High Dynamic Range, in the iPhone 12 camera. There is an icon in the upper-right corner of your camera app you can tap to turn this mode on or off. When enabled, your iPhone will rapidly capture several photos at different exposures and then blend them together. This allows you to capture the best highlight and shadow. This is a great tool for shooting in high-contrast environments.
Edit your photos
Editing your pictures gives them an extra pop and definition that they wouldn’t have otherwise! You can use the free photo app, which added new editing options in iOS 14. Adobe Lightroom, Snapseed, and Photoshop are a few other great editing apps. Try to keep your photo natural by not increasing any of your settings too much, but enjoy playing around with saturation, highlights, shadows, the warmth of your photo, and more!
Get creative!
Experiment with the camera and features on your iPhone 12, and have fun with it. The best way to improve your photos is to practice, experiment with different angles, play with different styles, and enjoy the process!
If you recently upgraded to the iPhone 12 camera, don’t let your old phone collect dust. Sell your used phone to gizmogo.com! We’ll pay you the highest possible price for your used phone, whether it works or not.
Gizmogo wants to work together with you to do our part, in preserving the environment. When you sell your phone to us, that’s one less phone filling up our landfills.