

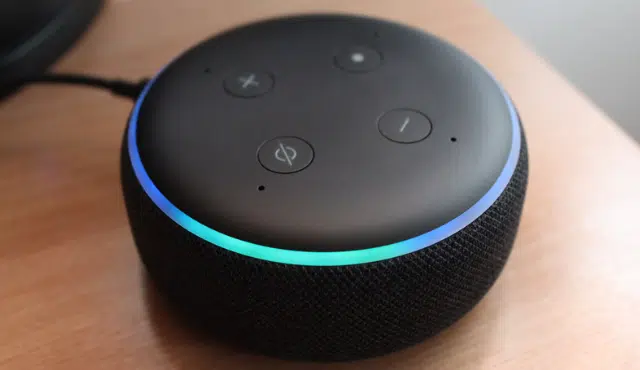
Before you sell an Echo, Nest speaker, HomePod, or Sonos, two separate jobs need to happen. You need to remove the device from your account, and you need to clear its memory with a factory reset. Skipping either step leaves a gap: either the new owner can’t set it up, or your account stays attached to a speaker you no longer own.
The safest way to sell a smart speaker is to deregister or unlink it from your account first, then run the model-specific factory reset, and finally confirm the device boots into its out-of-box setup screen with no trace of your login. This applies whether you’re letting go of an Echo Dot, an Echo Show 8, a Nest Audio, a HomePod, or a Sonos One.
Each brand handles this a little differently, and the instructions floating around online don’t always agree, especially for Echo devices where button-hold times vary by generation. Getting the sequence wrong can leave voice history, Wi-Fi passwords, or linked smart home routines sitting in your account long after the speaker has a new owner.
How Do You Remove Your Account and Personal Data?
Removing your personal data from a smart speaker takes two separate actions: unlinking it from your account in the app, and performing a physical or menu-based factory reset on the device itself. The account removal step clears your login and cloud connection, while the reset wipes Wi-Fi credentials, paired Bluetooth devices, and any local settings stored on the speaker. Cloud-based records like voice recordings and routines live on Amazon’s or Google’s servers, not on the device, so they need their own cleanup step.
What Is the Difference Between Resetting and Unlinking?
Unlinking (also called deregistering or removing) disconnects the speaker from your account so it no longer shows up under your devices. Resetting erases the data physically stored on the speaker, like Wi-Fi passwords and Bluetooth pairings, and returns it to factory condition. You need both: unlinking alone leaves wiped hardware still tied to your account, and resetting alone can leave your account listing a device you no longer have.
How Do You Deregister and Reset an Amazon Echo?
Deregistering comes first. Amazon’s own guidance confirms you should do both: deregister the device from your Amazon account, then factory reset it, “to ensure your privacy and allow the new owner to set up the device with their account.” You can deregister through the Alexa app under Devices, selecting the Echo, then choosing Deregister, or through the Amazon Content and Devices page on desktop.
Reset steps differ by generation, and mixing them up is a common mistake:
- Echo and Echo Plus (1st generation): Hold the reset button underneath the device with a paperclip for 5 seconds until the light ring cycles.
- Echo (2nd generation): Hold the microphone-off and volume-down buttons together for 20 seconds.
- Echo Plus (2nd generation): Hold the action button for 20 seconds.
- Echo Dot (1st generation): Hold the underside reset button with a paperclip for 5 seconds.
- Echo Dot (2nd generation): Hold microphone-off and volume-down for 20 seconds, the same as the 2nd-gen Echo.
- Echo Dot (3rd, 4th, and 5th generation): Hold the action button for 25 seconds, according to GearBrain’s device-by-device breakdown.
The Echo Show 8 and Echo Studio use their own combinations, and Amazon maintains current, model-specific steps for every Echo generation, including the Echo Studio’s 2019 and 2025 releases. Because button layouts change often, checking your exact model before resetting avoids holding the wrong button for the wrong amount of time. If you’re clearing out an older unit, Amazon’s device list also covers how to reset your echo device across discontinued models like the original Echo Dot.
Voice history is a separate cleanup. Saying “Alexa, delete everything I said today” removes same-day recordings, but for full voice history you need the Alexa app’s Settings, then Alexa Privacy, then Review Voice History, where you can delete recordings and toggle on deletion by voice, as outlined by GearBrain’s privacy walkthrough. This step matters because a factory reset clears the device, not your cloud-stored voice logs.
How Do You Remove and Reset a Google Nest Speaker?
Removing a Nest speaker from the Google Home app and performing a factory reset are both required, and neither can be done by voice. Google’s support page is explicit that a factory reset can’t be performed using your voice or the Google Home app; it has to be done physically on the device, and the action is irreversible once started.
Start by removing the device from the Google Home app under its device settings. Then locate the physical reset button or mic-mute switch combination specific to your model (Nest Audio, Nest Mini, or a Nest Hub display), since reset methods vary across Google’s hardware lineup. If you’re parting with a Nest Audio specifically, the process to sell nest audio speaker units starts with this same removal and reset sequence before any listing goes live.
A factory reset on a Nest device clears Wi-Fi credentials, paired accounts, and locally stored settings. It does not delete your Google Assistant activity history, which lives in your Google account and needs separate review through My Activity settings.
How Do You Unlink and Reset an Apple HomePod?
Unlinking a HomePod happens in the Home app, where you remove the speaker from your home before handing it over. Go to the Home app, select the HomePod, open its settings, scroll down, and choose Remove Accessory. This clears it from your iCloud account and Apple ID association.
After removal, a factory reset returns the HomePod to setup mode. On HomePod mini and HomePod (2nd generation), press and hold the top of the device until the white indicator flashes and you hear a confirmation tone. On the original HomePod, the same press-and-hold gesture applies, though timing can vary slightly by software version, so watching for the light sequence matters more than counting seconds.
If the HomePod won’t reset through the normal gesture (common with a unit that’s been sitting unused for a long time), Apple’s recovery mode via a Mac or PC using the Finder or iTunes can force a reset. This is worth trying before assuming the speaker is faulty.
How Should You Prepare a Sonos Speaker for a New Owner?
Preparing a Sonos speaker for resale depends on the model, since not every Sonos device resets the same way through the app. The Sonos app includes an option to remove a product from your system, which is the standard path for most current speakers and preserves the system’s other connections.
For a full factory reset that erases Wi-Fi credentials and system data, Sonos provides model-specific button sequences (commonly holding the join or action button for a set period until the status light changes pattern). Older models like the original Sonos One may need Sonos’s documented reset process rather than a generic app removal, since app-based removal alone doesn’t always erase everything stored locally. If you’re listing an original Sonos One, checking the sell one 1st gen process can help you confirm what buyers expect to see on first setup.
Always confirm which action you used: removing a product from the app keeps some system data intact for easy re-adding, while a full reset erases everything and returns the speaker to out-of-box condition.
How Can You Verify That Your Speaker Is Ready for Setup?
A properly reset speaker should show no trace of your account and offer a clean setup screen. For Echo devices, check the Alexa app’s device list first; if the speaker still appears under your account, deregistering didn’t complete and you’ll need to repeat the step before resetting. Once reset, the Echo’s light ring should cycle through its setup pattern instead of asking for your Wi-Fi password automatically.
For Nest speakers, confirm removal from the Google Home app’s device list, then power-cycle the speaker and listen for the setup tone that indicates it’s looking for a new network. A Nest device that still connects to your old Wi-Fi without asking is a sign the reset didn’t fully take.
HomePods should show the pulsing white light pattern associated with first-time setup, not a solid light or an attempt to rejoin your home network. Sonos speakers should appear as new, unclaimed products when scanned by the Sonos app on a different account.
The clearest test across every brand: try setting the speaker up yourself using a different Apple ID, Amazon account, or Google account than the one you originally used. If it completes setup without asking for your original credentials, it’s ready to list.
How Do You Prepare Your Speaker for Sale?
A smart speaker’s resale value comes down to generation, physical condition, and what’s in the box. Buyers also respond to clean photos and complete listings, and knowing where to sell makes the difference between a quick sale and a speaker that sits unlisted for weeks.
How Do Model, Generation, and Condition Affect Resale Value?
Newer generations and working condition drive most of a speaker’s resale value. A 3rd-generation Echo with Alexa still commands buyer interest on marketplaces like eBay, where completed listings show demand for specific generations rather than Echo devices generically. Checking sold listings (not just active asking prices) gives a more accurate read on what buyers actually pay, since asking prices are often optimistic.
Cosmetic wear matters, but functional issues matter more. A speaker with a cracked case but a fully working microphone and speaker will usually outsell one that looks pristine but has audio distortion or connectivity problems. If you’re pricing an Echo Dot 3rd generation or a 1st-generation Echo, comparing recent sell echo dot 3rd gen and sell echo 1st gen listings for that exact model gives a realistic price anchor.
Which Accessories Should You Include?
Original power adapters and cables increase buyer confidence and often justify a higher asking price. Smart speakers use proprietary or specific-wattage power supplies, and a buyer who has to track one down separately will usually offer less or pass entirely.
Include in your listing:
- The original power adapter and cable
- Any mounting hardware or base that shipped with the unit
- Original packaging, if you kept it
- A remote, for models like the Echo Show that included one
A speaker sold with its original box and accessories reads as better cared for, even when the device itself shows identical wear to a bare unit.
How Should You Clean, Photograph, and Pack Your Speaker?
A clean, well-lit speaker photographed from multiple angles sells faster and draws fewer lowball offers. Wipe down the fabric or plastic housing with a dry cloth, and use a soft brush to clear dust from speaker grilles and microphone ports.
Photograph the top, bottom, and any port or button area, including the serial number or model sticker if visible. Buyers want to see the exact model and generation confirmed, especially for Echo devices where small design changes separate one generation from the next, as with the Echo Show lineup’s multiple screen sizes and release years.
Pack the speaker with the original foam or padding if available, or wrap it in bubble wrap inside a snug box. A loose speaker inside an oversized box is more likely to arrive damaged, which leads to returns and disputes.
Selling Your Properly Unlinked Speaker to Gizmogo
Once your speaker is deregistered, reset, and confirmed clean of your account, Gizmogo buys smart speakers in a range of conditions, including units with cosmetic wear or minor functional issues. This matters for sellers whose Echo, Nest, or Sonos unit isn’t in like-new shape but still works.
The process works for most major models, whether you’re clearing out an Echo Studio, an older Echo 2nd gen, or a compact Echo Input you no longer need. You submit the device details, get a quote based on model and condition, and ship it in once you accept. For a broader view of what else qualifies, Gizmogo’s sell speakers category covers additional brands and models beyond Echo and Nest.
Selling through a dedicated buyback channel skips the back-and-forth of marketplace listings, which suits sellers who want a confirmed price without negotiating with individual buyers.